Thursday, January 27, 2011

WILL’S BOW Part 16. Completion.

Will Fedkenheuer’s bow is now finished and we can weigh it. It weighs 59.4 grams which is right where we want it. Without the light unlined frog the bow would weigh about 60.5 grams. It is now rosined and can be played and among other things, this is the final test of whether the total amount of camber is right for the bow’s intrinsic strength.

Players sometimes wonder how a maker like Peccatte could make such eminently playable bows and yet not play themselves. The answer is that a bow during its construction cannot be played and a maker must have the techniques and sensitivity to evaluate the stick as he is working it down. The stick is held in a certain way and flexed giving the maker a great deal of information on how the bow is bending along it’s length, the wood’s quickness of response and its level of resistance. By trial and error the maker learns to sense the things the player needs from a completely different frame of reference; how the stick feels in his hands.

Nonetheless if we have a reasonably good bow arm we can get our confirmation of the bow’s quality and also get a lot of pleasure in exploring its tonal potential; this bow got played late into last night. But no bowmaker will play at the level of his clients and so their feedback is essential. Perhaps it’s just as well for there are so many different solutions depending on the player and the instrument. The maker should approach each bow without preconceived notions based on his or her own taste.

Thanks to FedEx, Will can have the bow tomorrow and start to get to know it. For the maker this is the culmination of the performance, so much has gone into the bow and it is with a mixture of excitement and anxiety we send it off, hopeful that it will exceed his expectations. Everyone needs to serve, the violinist rehearses a Beethoven Quartet for weeks or months to be able to share Beethoven’s own gift, the parent nurtures their child, its part of human nature.


Wednesday, January 26, 2011

WILL’S BOW Part 15. The grip or winding and thumb-leather.

Now that the bow is haired we take the time to make sure the camber is exactly as we want it and make a few corrections if necessary. The argent-sur-soie grip is wound on the bow under tension and smoothed with a burnishing tool.

Then the thumb leather is fit and reduced to a knife edge on each end. When it is glued on, the two ends overlap perfectly and the joint is nearly invisible. Here we are using Morocco leather, a tough goatskin with a beautiful grain. The finest Morocco leather actually comes from Nigeria and is used primarily by bookbinders.

Tuesday, January 25, 2011

ARGENT SUR SOIE

The traditional French ‘garniture’ or winding material is called ‘argent sur soie’. It is composed of a silk thread wrapped tightly with a flattened filament of silver, not unlike a violin string. Argent-sur-soie was much used for military epaulettes and ecclesiastical robes as well as bows. It is also known as ‘French tinsel’ but this is unfortunate as it conjures up the stuff on Christmas trees; argent sur soie is actually significantly more expensive than silver wire and requires a lot of skill to make. You see it on bows going back to Tourte when it was mixed with alternating bands of colored silk. Later in the 19th century it was put on straight with a rather short thumb leather. When I was starting my career, the authentic argent-sur-soie had largely been replaced by a cheaper silver-plated material wrapped around nylon thread and the real thing was very hard to find. So it was a relief when the French maker Jean-marc Panhaleux discovered a workshop capable of recreating the original high quality argent sur soie. Not only were they able to make it in silver but also with the 18 carat French rose gold we favored for gold mountings.

Solid silver wire to the best of my knowledge appeared on the scene sometime after the second world war. Perhaps in part due to the Russian school, the vogue was for heavier bows and silver wire was a convenient way for a dealer to add several grams to a bow when it changed hands. Note however that this was extraneous weight that added nothing to the bow itself. It only enabled a dealer to say a given bow was 60 or more grams when it originally weighed 58. Over time silver wire became the norm except in England where Hill & sons often used whalebone grips. On a violin bow, an argent-sur-soie grip with the thumb leather weighs 2.3 grams. The same grip in the lightest silver wire weighs about 5 grams although if it doesn’t run under the leather it could weigh 4 grams. So silver grips typically weigh 2.5 or 3 grams more and this weight is not in the stick where it could do some good.

Monday, January 24, 2011

WILL’S BOW Part 14. Hair in the bow.

With everything completed except for the winding and thumb leather, the bow is ready for its hair. The horsehair is in a bundle weighing about a pound and secured at one end with thread and a clamp. It is hung from a convenient spot and the bow’s hair is selected. Since hair is variable one must always remove a number of twisted or weak hairs until a hank of the correct amount is ready.

The hank is tied with a whipping or ligature at one end and inserted into the mortise in the frog. Then it is secured with a fitted wooden wedge and the pearl slide and ferrule are replaced. Another wooden wedge, the spread wedge, keeps the hair spread out evenly at the ferrule where it leaves the frog. The hair is dampened and combed out evenly towards the head and another ligature is tied at exactly the right length just beyond the head’s mortise. Another wooden wedge has been prepared for the head and the tied off hair is secured in the head as well. When the hair has dried the hair is wiped clean with alcohol and it is ready to rosin.

Friday, January 21, 2011

WILL’S BOW Part 13. The button completed.

The button with its two silver rings in place is put back in the lathe and the collar is cut. Then the screw hole is drilled and the recess for the nipple on the stick is cut. A recess is also cut for the pearl eye that will go at the end. A screw has been prepared that matches the mortise and the hole going through it. The majority of makers buy partially threaded steel rod from a specialist. Then the rod is turned on the lathe to the correct dimensions and one end filed square where it will be driven into the button.

The screw is hammered snugly into the button and checked for straightness. Then the pearl eye is filed to fit and glued in place. At this point the button is held in a little vise and the facets are filed.

When these are nearly completed a small hole is drilled in each ring and a silver pin is riveted into place. This prevents the ring from ever turning. The button is then filed with fine files, polished and the work is complete.

Thursday, January 20, 2011

WILL’S BOW Part 12. The button as an element of style.

The button functions as an easily turned end to the screw that pulls the frog back, thereby tightening the hair. However, as in virtually every part of a bow, the style of the maker and the period in which they worked asserts itself strongly. We can be fairly certain that Francois Tourte, with his clockmaking skills, developed the button as we know it with the two rings that serve to keep the ebony from splitting. This button had a round collar turned on a lathe where the button joins the stick and then the rest was filed to an octagon like the stick. In a stylistic sense the collar serves the same purpose as the capital or cap on a Greek column and directs the eye back down the column or the stick in this case. The octagonal part of the button is often flaring and wider at the outer end, which also visually caps the stick and sends the eye back. A button tapered to a smaller diameter at the end would appear weak.

The collar went through an evolution and was originally a feature of the plain ivory buttons of the transitional period. It normally was composed of a large flaring outer collar and a narrow inner one. Starting with Tourte, this inner collar was often filed off with each facet of the octagon leaving a small triangular flat at each facet. Since the buttons were presumably made in advance the octagons would be filed to different sizes to match the diameter of the stick and sometimes the inner collar would be untouched. Later other makers, notably Persois, cut collars with a strong inner collar ring that was intentionally left proud, giving his buttons an distinctive appearance. With Peccatte the inner collar is typically filed off. Later in the 19th century, starting with Voirin and continuing with Lamy and Sartory, the inner collar was intentionally kept low and petit to avoid it being filed. The large outer collar was often given a graceful bell shape. This goes hand in hand with other elements of Voirin’s style and his search for refinement.

Before the industrial revolution demanded that every component of a given manufactured item be uniform and square, people we far less concerned with symmetry and 90 degree angles than they are today. Nonetheless there were certainly plenty of other aesthetic concerns. In the earlier bows the ‘pannes’ or octagonal handle of the bow at the frog was tapered and often the facets on the sides and top and bottom of the stick were significantly larger than the facets on the diagonal. The button was filed freehand by eye as we still do today in this shop. This way the facets can be tapered toward the collar and give the whole button a more lively appearance. Occasionally the file hits and nicks the outer collar slightly. In this way form follows the working practice of the maker and becomes style.

Wednesday, January 19, 2011

WILL’S BOW part 11. The button.

The button can be made at any time since we can use another one temporarily; so while we are waiting for the varnish to dry we can start work on it. As with the rest of the bow we start with raw materials, a piece of ebony and some silver in a sheet one millimeter thick.

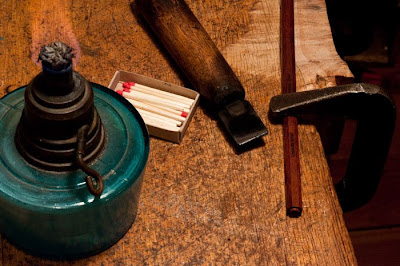
Then two strips of silver are cut out with a jeweler’s saw and bent to form rings with the ends lining up. Each ring is heated in an alchohol lamp until red hot and joined with silver solder.

Then the ring is hammered on a mandrel or tapered rod until it is perfectly round and the desired size.

At this point we get out a little watchmaker’s lathe and clamp it to the workbench. This lathe is the only powered tool in the shop although we use a bandsaw to cut up the pernambuco boards into rough sticks. A small piece of ebony is secured in the lathe and turned round to the size of the rings. Next the ends get reduced until the rings can be hammered on forming a small barrel-like cylinder.

The function of the rings is to prevent the ebony from splitting when the screw is hammered in but it now is part of the bow’s style. In the next post we will carry the button through to completion.


Tuesday, January 18, 2011

WILL’S BOW Part 10. Varnishing.

When the stick is completed it needs to be sealed with a varnish. The varnish on a violin is relatively substantial and plays a role in the instrument’s tone. The varnish on a bow, however, can be quite thin since it is only there to seal and protect the wood and prevent the bow from being effected by rapid changes in humidity. Some makers like to apply enough varnish to fill the wood’s pores completely while others prefer the minimum.

The varnish’s main ingredient is lac, the resinous secretion of an order of insects of the Coccoidea family. The insects deposit the lac on the twigs of certain trees in Thailand, India and other parts of Asia. The twigs are collected and thoroughly cleaned to form a deep red granular product called seed lac or the lighter, more refined shellack in flakes. The varnish itself is made by dissolving lac in alcohol and optionally adding small amounts of other resins. The varnish is not applied with a brush but rather with the technique called French polishing where the varnish is applied to a clean cloth with a little oil and rubbed on the bow. A number of coats are applied to bring the bow’s surface to the maker’s satisfaction.

Wednesday, January 12, 2011

WILL’S BOW Part 9. Stamping the stick.


With the head carved and the stick round we go back to the ‘pannes’ or area at the frog. The facets are given a final pass with a sharp plane and the stick is ready to be stamped with the makers mark. Traditionally the bow is stamped upside down presumably so that if the player holding the bow normally lifts it up to read, it will be right side up. In the earlier 19th century the mark went near the thumb leather but later on the school of Voirin including Lamy and Sartory started stamping further back over the mortice. Perhaps this was because a player’s thumb could wear on a stamp at the leather. Bowmakers normally stamp their bows under the winding as well as a contingency for the day their stamp by the frog becomes illegible.

The stamp itself is cut from steel by an artisan engraver and will last a lifetime. However, makers would change stamps for various reasons. Sartory went through a couple before he settled on his well known stamp with the wear on the first letter. Stephane Thomachot and I ordered our stamps together from a little shop in the Marais, rue Pont aux Choux I think. The proprietor sold stamps of all kind but I believe he had our stamps made by another artisan. The stamps were cut by hand with punches and files and were fairly crude under magnification. Not long after that the engraver Boutroué offered stamps made with a special milling machine that were far more precise but I think the hand made stamps have a lot of character.

Stamping is done with a stamp that has been heated over an alcohol lamp. Then a match is burned under it to apply some carbon black to impress into the wood. The stamp should not be hot enough to actually burn the wood but the heat helps it penetrate. The stamp is applied freehand and this is difficult so it is not unusual to see a crooked stamp. Violin bridge stamps had a face in the form of an arc and were rolled onto the bridge. Vuillaume’s bow stamp was also of this type, which explains why his stamps wander. The collector Jean Trible told me the story of acquiring an unstamped gold mounted bow he was certain had been made by Emile August Ouchard. He arranged to visit Ouchard at his home in the country one Sunday hoping that he could return with a stamped bow. Ouchard agreed that he had made the bow but having consumed a lot of wine that day overheated his stamp. The results were barely recognizable but Trible remembered the day with amusement.

Monday, January 10, 2011

WILL’S BOW Part 8. The head.


With the stick round, the final carving of the head takes place and the mortise for the hair is cut. As we mentioned earlier, we have chosen a particular height for this head to compliment our concept for the bow’s relative flexibility and the actual transition where the head meets stick has an effect on the bow’s sensitivity. In addition the overall mass of the head effects the bow’s distribution of weight.

The head is also the most sculptural element of the bow and here the bowmaker’s personal style manifests itself strongly. While the throat of the frog is also a sculptural element it is bounded on three sides by the frog itself. The head is a three dimensional form that could manifest itself in many ways and still function to hold the hair. The sketch illustrates some of the variables the bowmaker works with in developing a style. Is the ‘dessous cou’ or back of the head turning sharply or roundly from the stick. How is it angled, forward or back? How does the base or line of the tip plate relate to the curve of the stick? Is it relatively flat or strongly curved? How delicate is the ‘bec’ and how far does it extend from the rest of the head? How does the ‘arete’ or ridge along the front of the head relate to the curve at the back of the head. Does the head appear wide above or bell shaped? Finally how sharp or rounded is the curve from the arête to the top of the stick? And how does that curve relate to the curve between the back of the head and the underpart of the stick? A sharp curve in front and back gives the head a hatchet-like appearance. However Eury very effectively used a very rounded front contrasting with a very angular ‘dessous cou’. These are things bowmakers and connoisseurs notice but any player will appreciate the overall elegance of a beautifully conceived head.

Another strong stylistic element is the ‘chanfrein’ or chamfer, a bevel cut at the angle between the sides and back of the head. It can be cut in many shapes and nowhere else is the signature of the bowmaker more evident. On earlier 19th century bows the chamfer is a pure unpolished stroke of the maker’s knife that brings to mind the calligraphic nature of Sumi painting. Later in the 19th century the knife marks were usually cleaned up with a file but the chamfer still had the stamp of the bow’s maker.

Sunday, January 9, 2011

KNIFE STEEL


The primary tool for carving the head is the bowmaker’s knife or ‘canif’, which should function like an extension of his or her hand. A great knife has the same mystique as a great bow. One might readily imagine steel as a uniform material but nothing could be farther from the truth. Industrially produced knives can take a razor edge but they fail to make contact and chatter as they cut. Blades from a legendary Mirecourt knife-maker, Grandclaire, have an amazing ability to cut smoothly through the hardest pernambuco. Rene Morel once told me that Grandclair forged his own steel by working in the carbon that gives it toughness. I believe a toolmaker could do the same today but I haven’t encountered anyone who wants to go to the trouble when you can buy steel off the shelf. We also like to use old Sheffield straight razors that we grind down to the required shape. Because the ebony and pernambuco wood we use is so much harder than maple and spruce, the bowmaker sharpens his knife quite differently from a violinmaker.

Here are knife blades before they are set in handles and sharpened. The top one is a Sheffield razor partially ground to a knife shape. On the bottom two you can see the stamp, Grandclaire à Mirecourt.

Saturday, January 8, 2011

WILL’S BOW Part 7. Rounding stick and carving head.


When the bow feels good, whiplike in the hand, it can be rounded. In the French tradition, bows in the very early 19th century were often octagonal; Tourte and Eury are good examples although they also made round bows. Then starting with Persois and Peccatte the general preference was for round bows. But whether or not the maker plans for a bow to be round or octagonal, the bows are planed down to size as octagons. Then if a round bow is planned, the corners are taken off making it sixteen sided and then 32 sided at which point it is practically round with a few more strokes of the plane.

Here we are rounding the bow and concurrently the head is getting carved down as well so the curves of the head flow into the stick.

Thursday, January 6, 2011

WILL'S BOW part 6, adjusting the stick.

The stick is within a few tenths of a millimeter from its final taper. Now we go back to the bow’s curve or camber and make little adjustments here and there. We are allowing the stick to flex evenly down its length, bending fluidly according to the concept we’ve built in our discussions and musings. The curve we choose will allow for a good contact at the head and as well as at the frog, giving an evenness from head to tip. But no single curve will be right for everyone or for every instrument. The camber, density and resistance of the stick must also match the instrument’s response if the instrument’s potential is to be reached. For a really fine bow there is no limit to the time and care that should be put into this stage, it is amply repaid in the bows performance.

Although the fact is obvious, its important to understand how we are playing the violin with a band of hair, not a stick. The stick supports the hair and the relationship between the two creates a complex dynamic. Each player is most comfortable playing with the hair at a certain height and at a certain tension. But there is also the range of hair tension they will want to be able to access or work with. It’s important that the player be able to access a certain tonality or play a certain repertoire with a relaxed hair band that does not bottom out on the stick. Equally, a powerful attack and great dynamic range may be called for. The bow should be able to respond to these extremes with a turn of the button and this is possible when plenty of the stick’s power is placed in reserve. A ballet dancer exemplifies our ideal of flexibility supported by strength and resilience. As certain people are born with the gift and calling to dance, certain sticks have the gift to make an exceptional bow.

Wednesday, January 5, 2011

HOMAGE TO A TREE


Now we are planning the stick down to its final dimensions, an even taper that together with the camber will give the bow its character. But without the resiliency of the wood itself, nothing can be done. The bow is collaborative effort between the maker and the tree the wood came from. Each tree is different from the next, in its genetics and from the conditions under which it grew, the minerals in the soil, the rainfall. In later posts, I will go further into the ecology and conservation of Pau-brasil, as Pernambuco wood is known in Brazil. This stick we are working on is highly selected, first the log in Brazil 24 years ago and later in my shop as I cut the boards into sticks. The board this stick came from produced three sticks, two of which are already in the hands of great players. Even though we know quite a lot about this stick’s potential we still must approach it openly, thinking about the player who its destined for.

One way a bowmaker can evaluate a stick is simply to feel the plane shavings. Great wood makes wiry curls that spring back when pulled and their density gives them a waxy sheen. If you put a single shaving into a glass of water it will turn that water a bright nearly day-glo pink. As you may know, pernambuco wood is a dye that was imported into Europe long before its discovery for bows.

Monday, January 3, 2011

WILL’S BOW Part 5. Tip plate and head.

Now the head is brought down to its anticipated height and the tip-plate with its ebony liner is glued in place. The height of the head strongly influences the way the stick articulates because it acts like a tiny lever that facilitates pulling up the hair away from the stick. Even a difference in height of one tenth of a millimeter will make a difference. In a sense the head depowers the stick and allows the hair to be at playing height without being under too much tension. The stick itself is just as strong but that strength is kept in reserve. We will go into this in more detail when the stick is being adjusted. Historically, earlier bows had a higher head and this was reduced by Voirin and his school in the latter 19th century by about one millimeter.

Bowmakers typically work directly with raw materials, working with logs or boards of wood and sheets of silver or rough slices of mother of pearl. But traditionally the tip plate was prepared in its simple rectangular form by another artisan or a bowmaker who specialized and could purchase a special saw and cut large numbers. In France in the 1980’s, virtually all tip plates were prepared by Roger Gerome, a genial old Mirecourt bowmaker. The photo on the left shows him when he was younger. I remember visiting him and seeing his fine jigsaw for cutting ivory. He joked that ever since he gave his chickens ivory dust they laid white eggs.

Until the 1980’s all fine bows had an ivory tip-plate with the exception of a few with gold or silver tip-plates. But then bow-makers became aware of the plight of Africa’s elephants and the export of ivory was controlled strictly by CITES, the international organization regulating the trade in endangered species. After experimenting with bone, which is less than ideal, bowmakers discovered the availability of Mammoth ivory. In the permafrost of Siberia and Alaska, the local peoples keep an eye on the constantly changing riverbanks as they travel by boat. From time to time the tusks and other remains of a Mammoth will be exposed after lying frozen for over 10,000 years. These tusks are legally collected and sold, offering bowmakers an alternative. I have used Mammoth ivory for about 25 years. Sometimes while filing the material I smell its toasty odor and I’m astounded to be working with a natural material that is so old. The tips are cut out for me by an ivory carver who makes use of his scraps. They come oversized so I cut them down to size and bend them.

The tip plate includes a layer of ebony that varies in thickness according to the head’s style or period. The tip-plate is glued on with a mixture of two kinds of hot glue in equal proportions, ‘colle de nerf’ and ‘colle de os’. One is made from sinews and the other from bones. This glue has been used in woodworking since the time of the ancient Egyptians and has always been used in violinmaking. In my opinion it will last longer than any synthetic glues.

At this point the head will stay in its roughed out state while we plane the stick down further.

Saturday, January 1, 2011

WILL’S BOW Part 4. Mortise and screw.

With the frog fit we now cut the mortise the screw will ride in, using a little chisel called aptly the ‘mortaise de pannes’. This is done by bracing a knee against the bench and holding the stick firmly on the knee. The stick is very stable in this position and the mortise can be cut securely. Years ago I had just finished making a new chisel and took a small piece of ebony to test it on. The ebony flipped to the side and I drove the chisel to the bone. This made it hard to climb the 6 flights of stairs to my little apartment/workshop on rue Joseph Dijon in the 18ieme arrondisement.

With the mortise cut, the eyelet can be screwed into the frog.

Then the screw hole is drilled using a traditional tool called a ‘foret’. It is operated using a bow made of an old fencing epée and a cello string. The stick is held freehand as the drill bit is directed by eye. The foret is used for all drilling on the bow and like the plane and other tools, they were made by specialized blacksmiths in Mirecourt. They are very hard to find, the violinmaker Vincent Lainé let me have one he had. But the American bowmaker Michael Hattala had the castings made and turned out some excellent forets for some colleagues.